
Creating Query Table Data in Zoho Analytics using SQL Queries
Introduction:
Zoho Analytics is a powerful business intelligence and analytics platform that allows you to derive meaningful insights from your data. One of the key features of Zoho Analytics is the ability to create Query Tables, which combine data from multiple tables using SQL queries. In this blog post, we will explore how to harness the power of Join to create Query Table data in Zoho Analytics using SQL queries. This capability enables you to consolidate and analyze data from various sources to gain comprehensive insights.
Step 1: Understanding Query Tables in Zoho Analytics
- Query Tables in Zoho Analytics allow you to combine data from different tables or views using SQL queries.
- They serve as virtual tables that can be utilized for reporting, analysis, and generating meaningful visualizations.
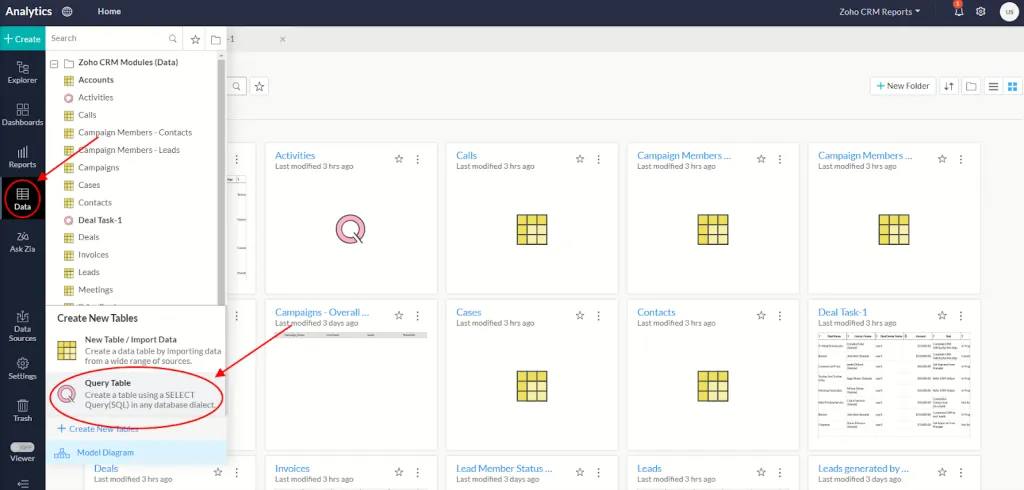
Step 2: Accessing Zoho Analytics and Creating a Query Table
- Log in to your Zoho Analytics account.
- Navigate to the “Data” tab and select the workspace or database where you want to create the Query Table.
- Click on the “Create” button and choose “Query Table” from the options.
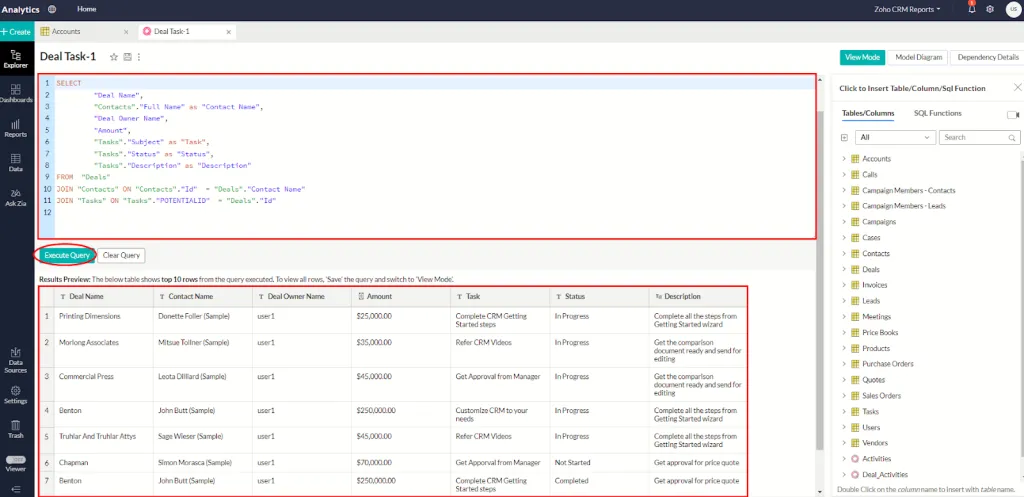
Step 3: Defining the SQL Query and Joining Tables
- In the Query Table creation wizard, provide a suitable name and description for your Query Table.
- Choose the required tables or views that you want to join.
- Craft the SQL query using the SQL editor provided by Zoho Analytics.
- Utilize the JOIN statement in your query to specify how the tables should be joined based on common columns.
- Select the appropriate JOIN type (e.g., INNER JOIN, LEFT JOIN, RIGHT JOIN) depending on your data relationship and analysis needs.
Step 4: Mapping Columns and Configuring Join Conditions
- Map the columns from the joined tables to the corresponding columns in your Query Table.
- Define the join conditions by specifying the common columns on which the tables should be joined.
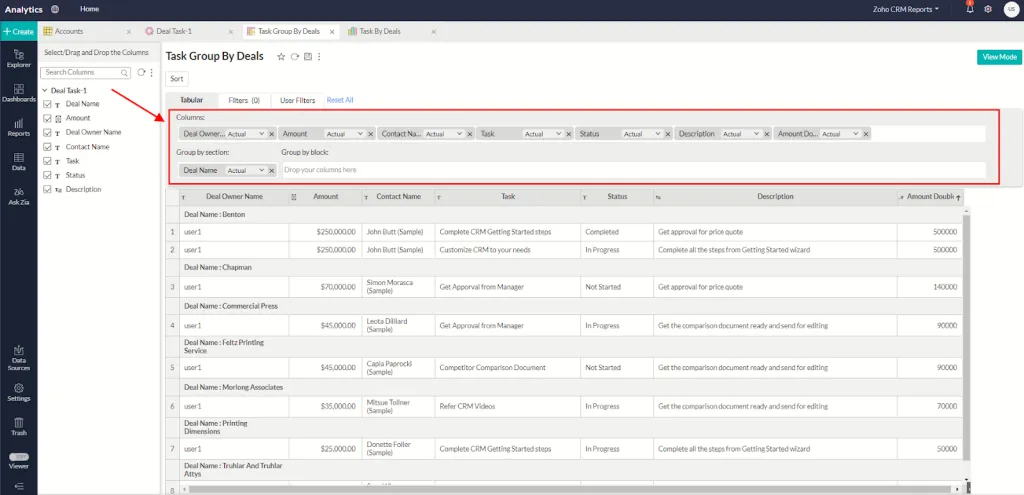
- Configure any additional options, such as sorting or filtering the data, if required.
Step 5: Previewing and Validating the Query Table Data
- Preview the results of your Query Table to ensure that the data is correctly joined and aligned.
- Validate the output against your expectations, verifying that the desired columns and records are included.
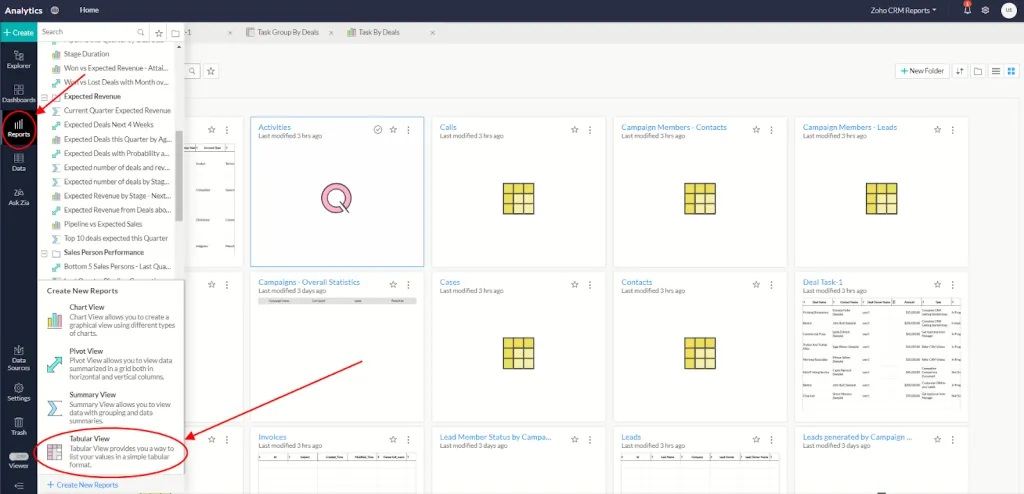
Step 6: Saving and Utilizing the Query Table Data
- Save the Query Table in your Zoho Analytics workspace or database.
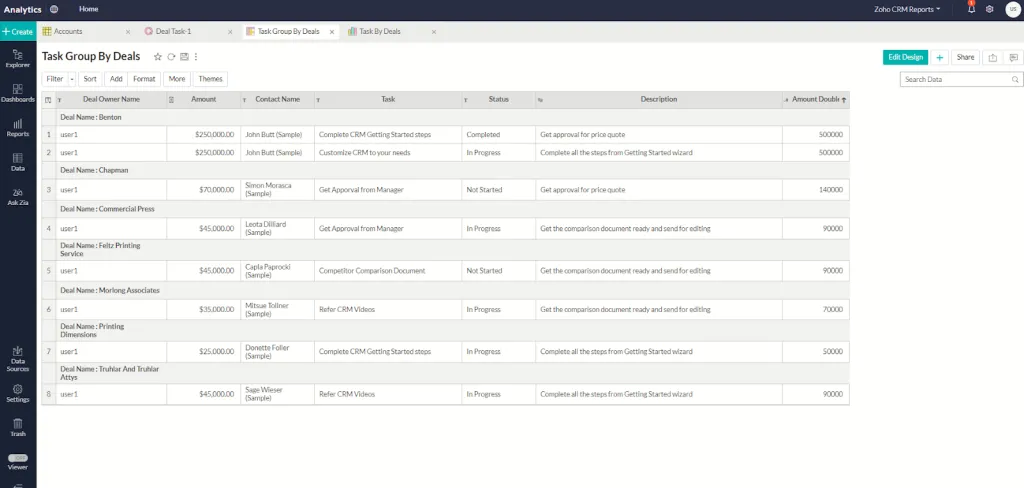
- Leverage the Query Table for various data analysis tasks, such as creating reports, visualizations, or dashboards.
- Apply filters, aggregations, or additional transformations to further refine the Query Table data.
By leveraging the power of Join and SQL queries, Zoho Analytics empowers you to create Query Table data, combining information from multiple tables into a consolidated view. This capability allows for comprehensive analysis, reporting, and visualization of data from diverse sources. With Zoho Analytics, you can unlock valuable insights and make data-driven decisions to drive business success.