

ServiceMax – Create Wizard for Transaction
Wizard is used for adding the SFMs to record detailed page layouts and making them available to the required group of ServiceMax users. We’ve got two types of wizards: Classic and Lightning.
Permissions: Servicemax Config Data is the option to create, update, and delete the Wizards.
Here we’re going to create one Lightning Wizard. The steps are as follows:
Step 1:
In the App Launcher, look for ServiceMax Setup to land on the setup page.

Step 2:
In the ServiceMax setup page, we’ve got the Service Flow Manager option, Under that, click Wizards to create.
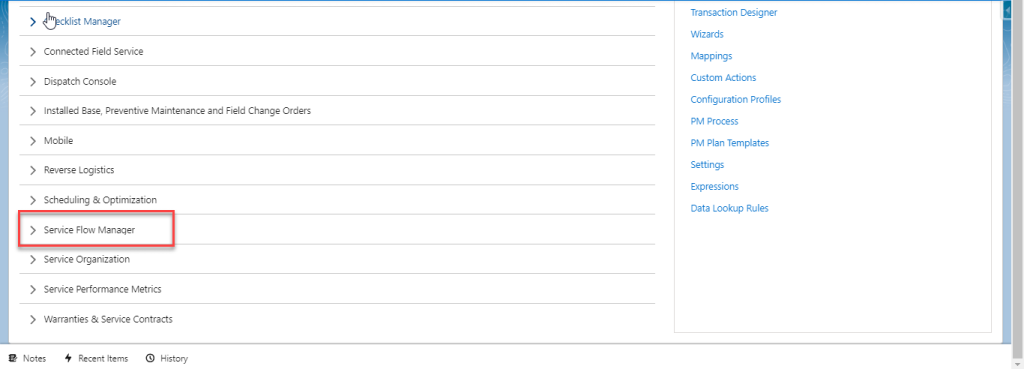
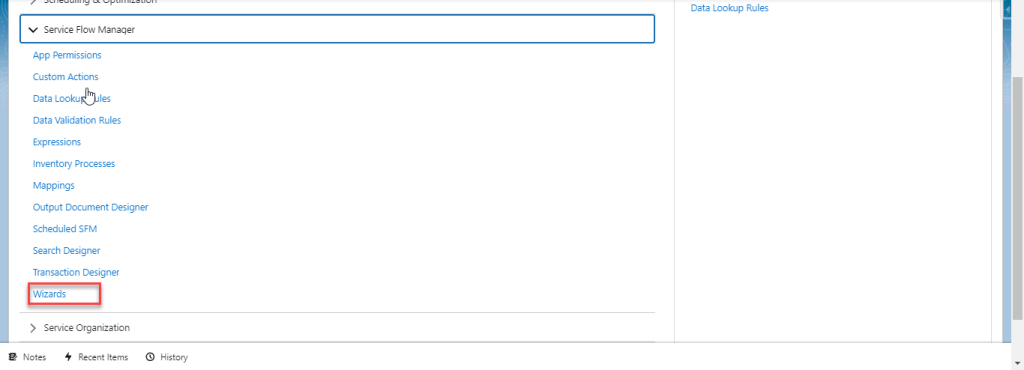
Step 3:
In the Service Flow Wizard page, select the object in the Select Object picklist and click the New button. This is for objects that already have at least one standard or custom SFM wizard configured.
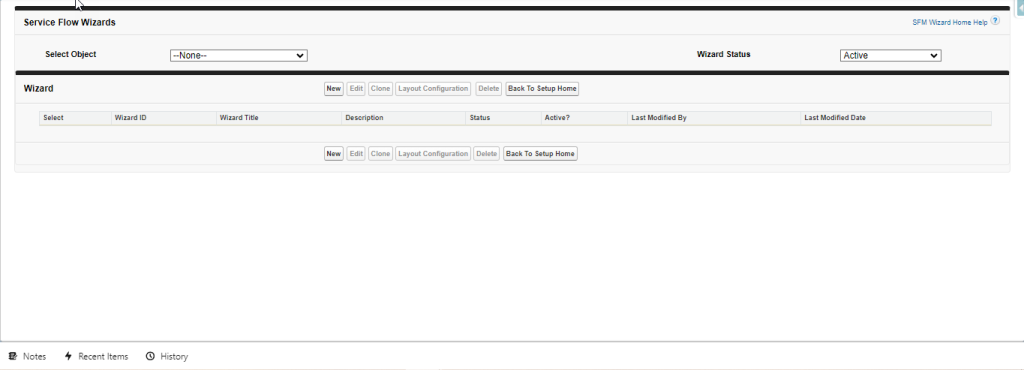
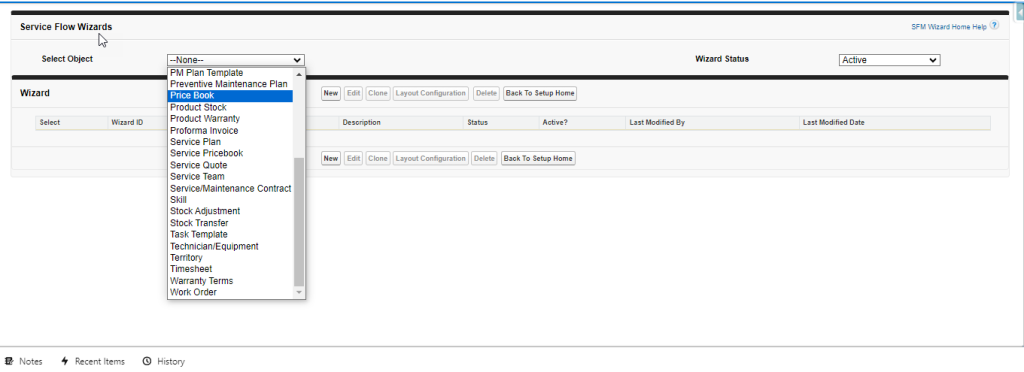
Here, for example, We’re selecting the Account object as the demo
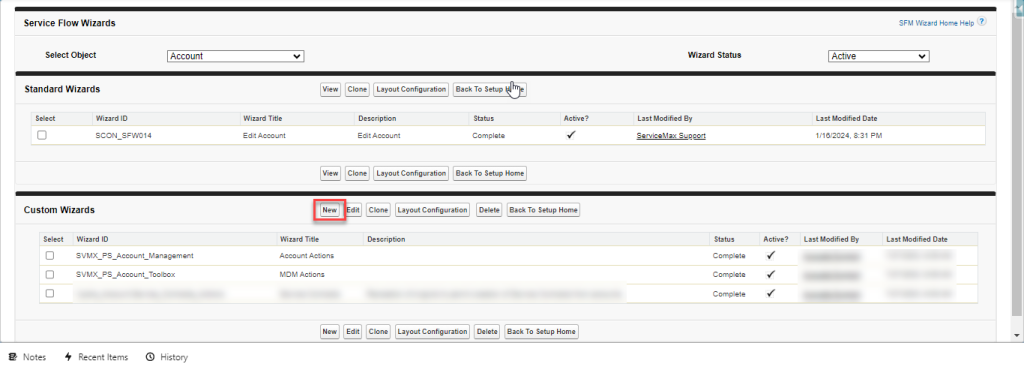
The Standard Wizard in which the SFM Transaction Designer exists comes from the package of ServiceMax. Custom wizards are the ones created for our purposes.
Step 4:
Click on the New button to create a new wizard as per our requirements. By creating the new wizard, we’ve got 3 tabs, which are:
1) General Information – used for the properties of Wizard and criteria to enable the wizard.
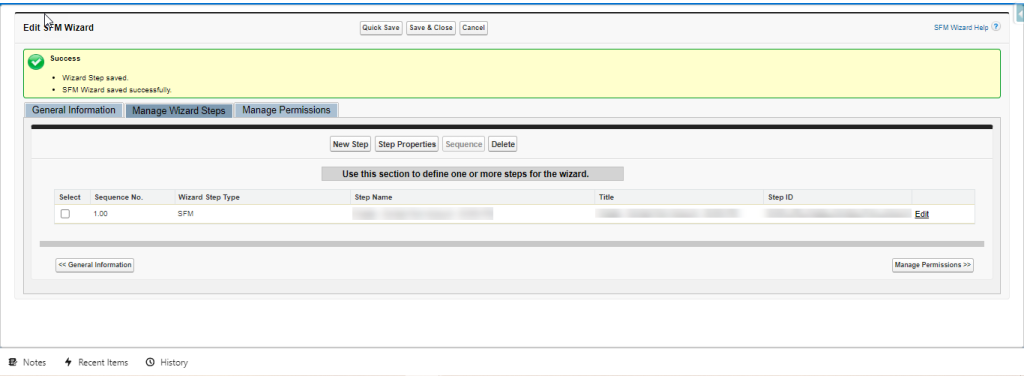
2) Manage Wizard Steps – used for adding the SFM Transaction designer and also criteria to enable the SFM transaction designer.
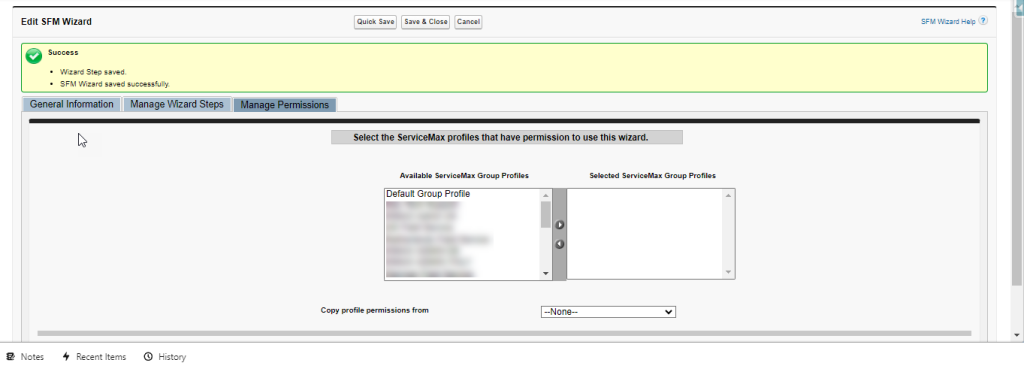
3) Manage Permissions – used to enable the permission to show wizards for the users.
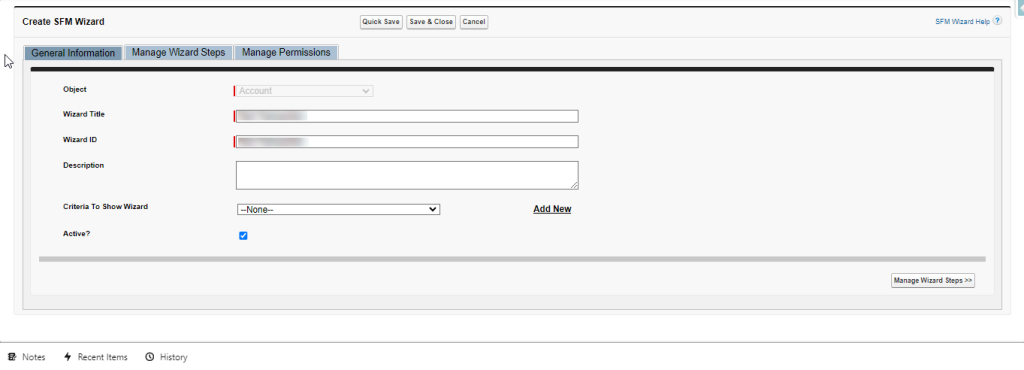
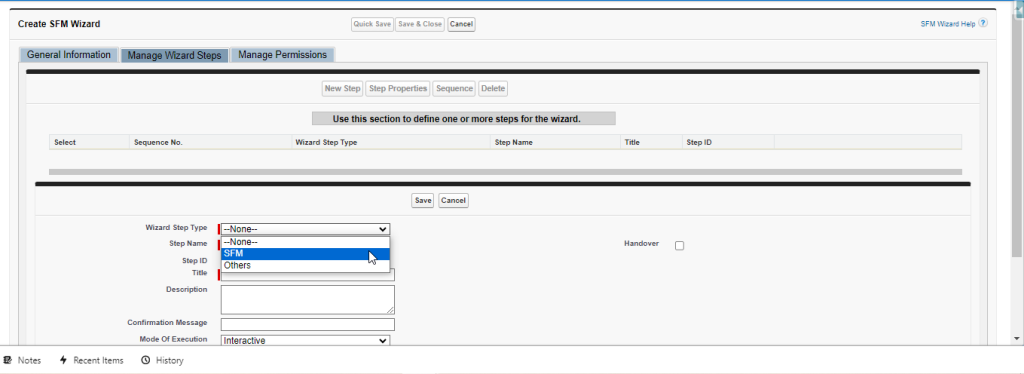
From the above screenshot:
Handover is the functionality used for redirecting the page from its source.
If the handover option is checked, it will redirect to the child object after saving the record from the source. If the Handover option is unchecked, then it will redirect to the same object, which is the source object.
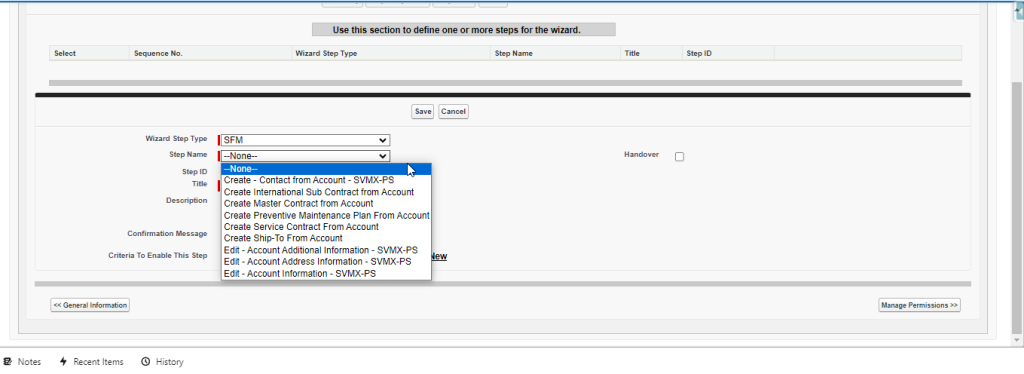
Step Name is the one that we created in Transaction Designer according to the object. Criteria to enable this step are used for enabling the Transaction Designer when the field matches the condition.
Step 5:
In the tab Manage Permissions, we’ve got to select the Profile to show the Wizard. Then click Save.
Step 6:
On the record detail page, we need to add the SFM Wizard section by using the Edit page option.
Then Wizard with Transaction Designer is shown on the record detail page.