
Creating Community Cloud Site in Salesforce
Salesforce Community Cloud allows organizations to build branded community spaces-or information-sharing portals—where users can connect, collaborate, and get work done. Salesforce communities are productive ecosystems within a Salesforce organization that are easy to build with Salesforce’s intuitive tools and templates.
Enable Communities in Salesforce
We are not able to launch the community without verifying the license. If the license is available the following step is used for login to the Salesforce Account and locate the “Company information” section.
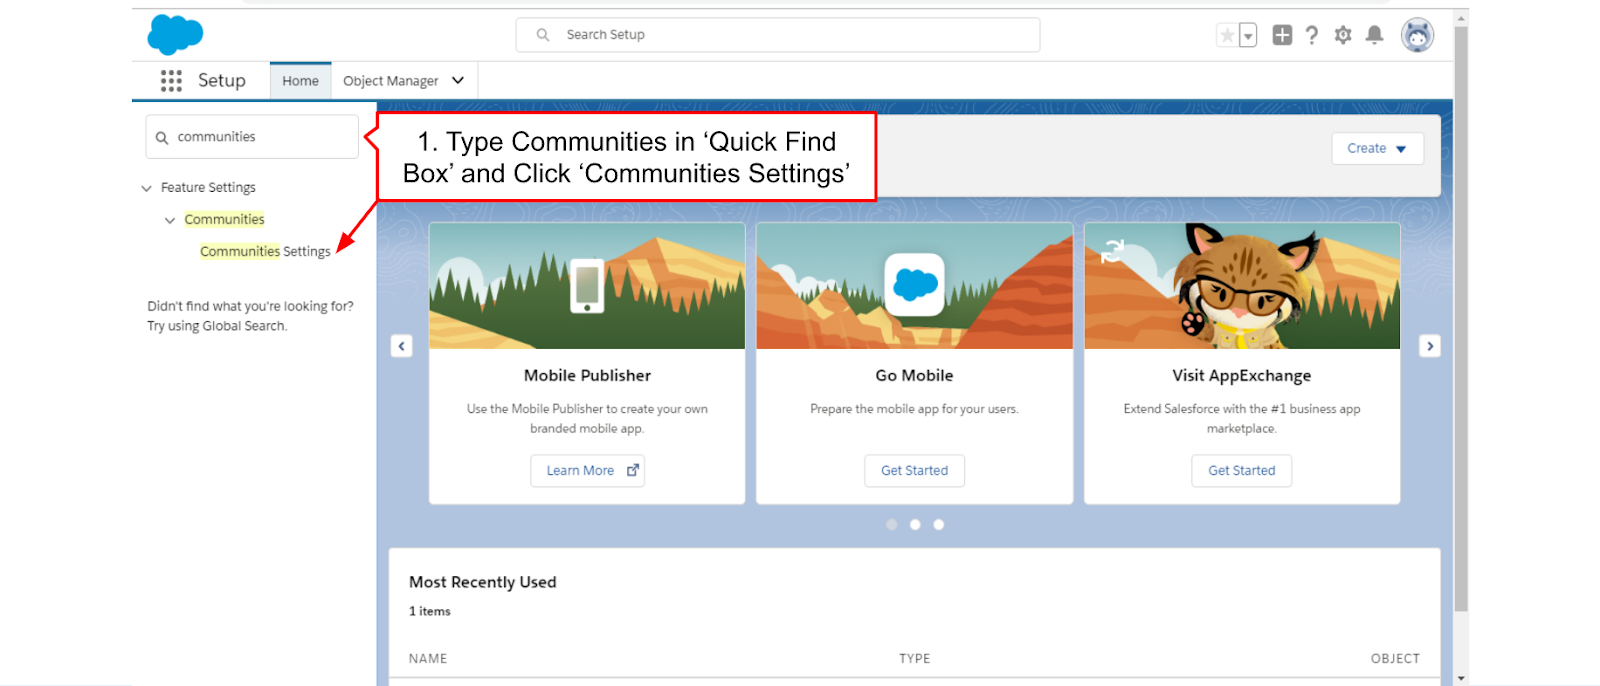
- Communities
- Communities Settings
- Enable communities
The Visibility of data in communities can be controlled using profiles and permission sets. The Multiple communities can be created in Salesforce org to address different purposes.
Create a community site :
Go to Setup Menu and Search in the Quick Find box as Community Setting .
Go to Quick Find box: To select Communities setting.
To click the Enable Community option.

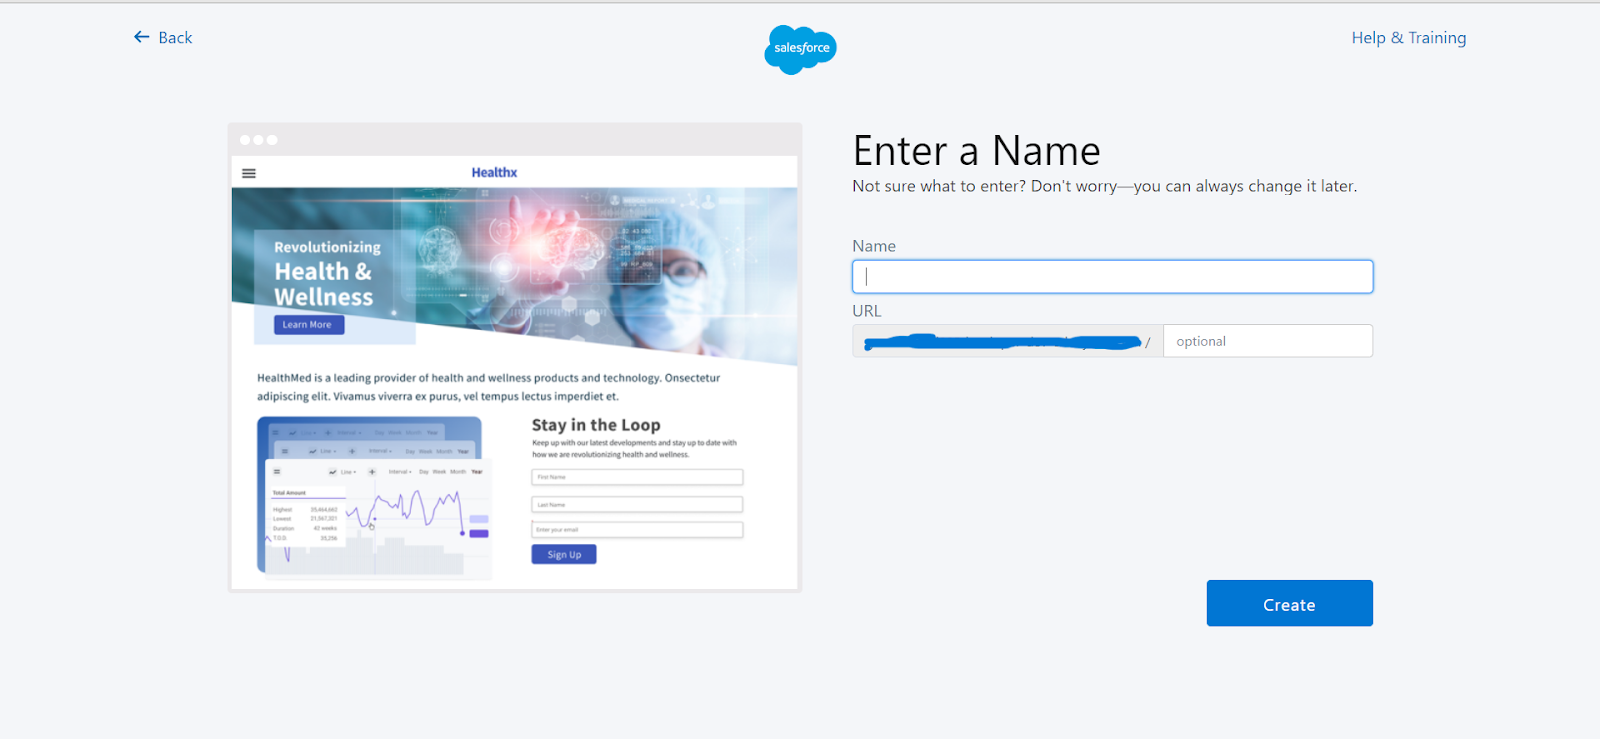
Specify a your domain name :-
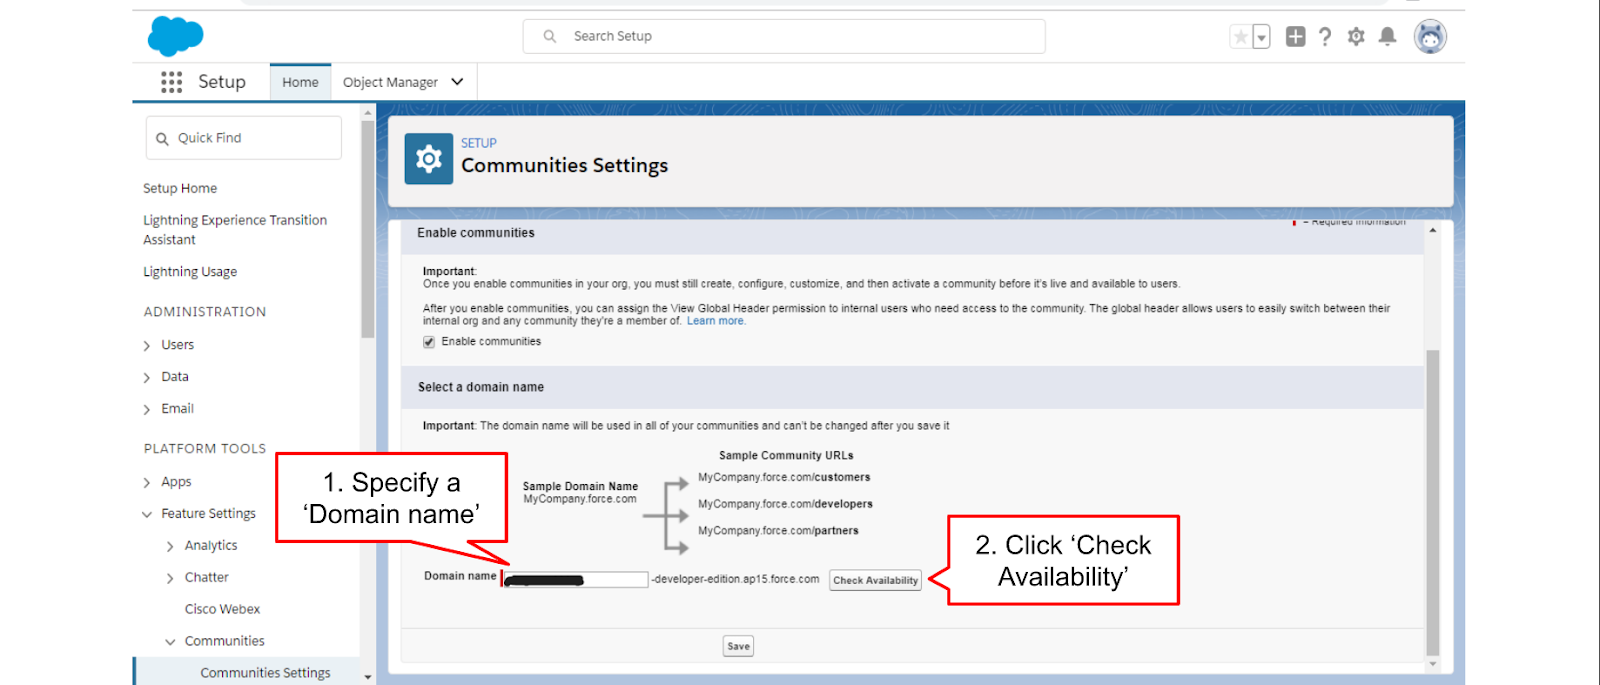
Check your domain name( if available) then you can see the success message then Click the Save button.

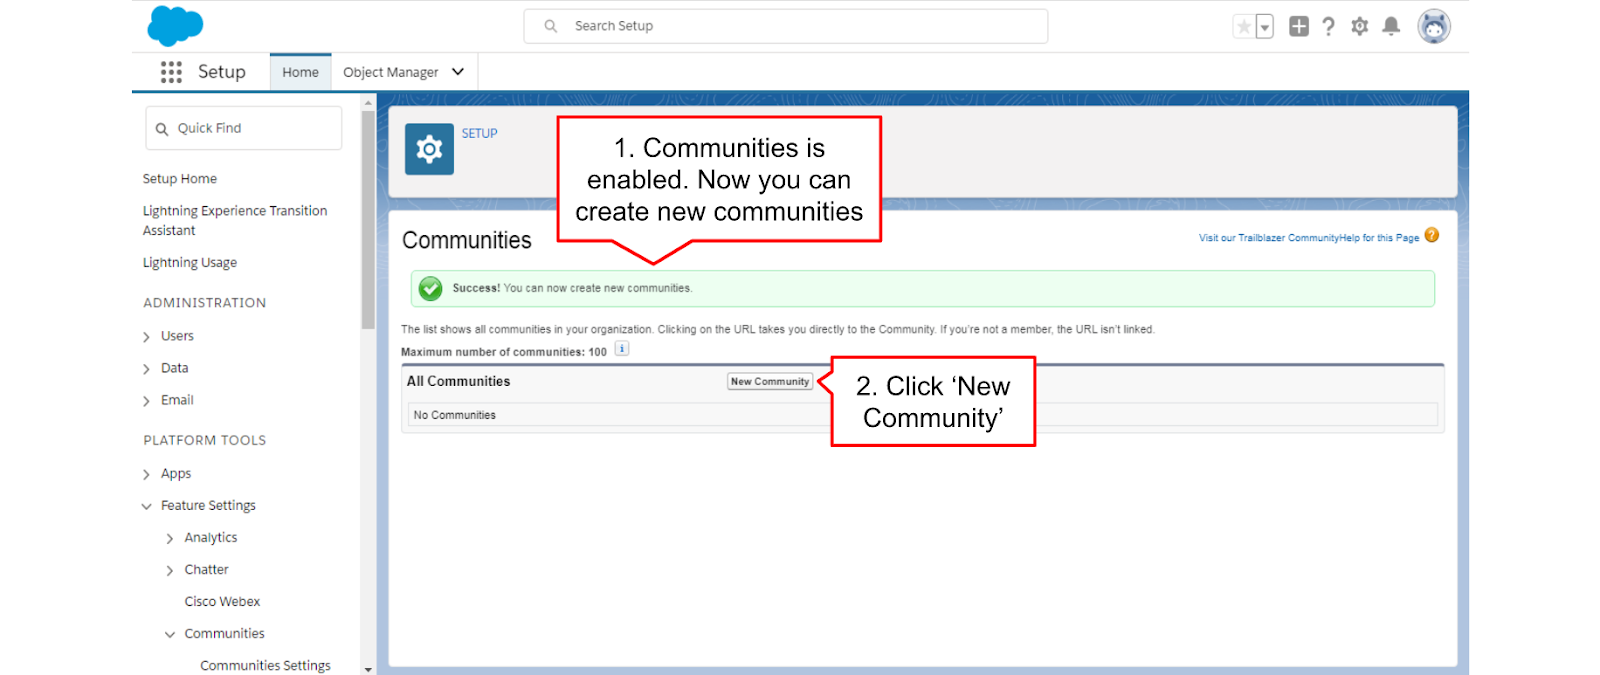
Your Community enabled then you can see the New Community button .
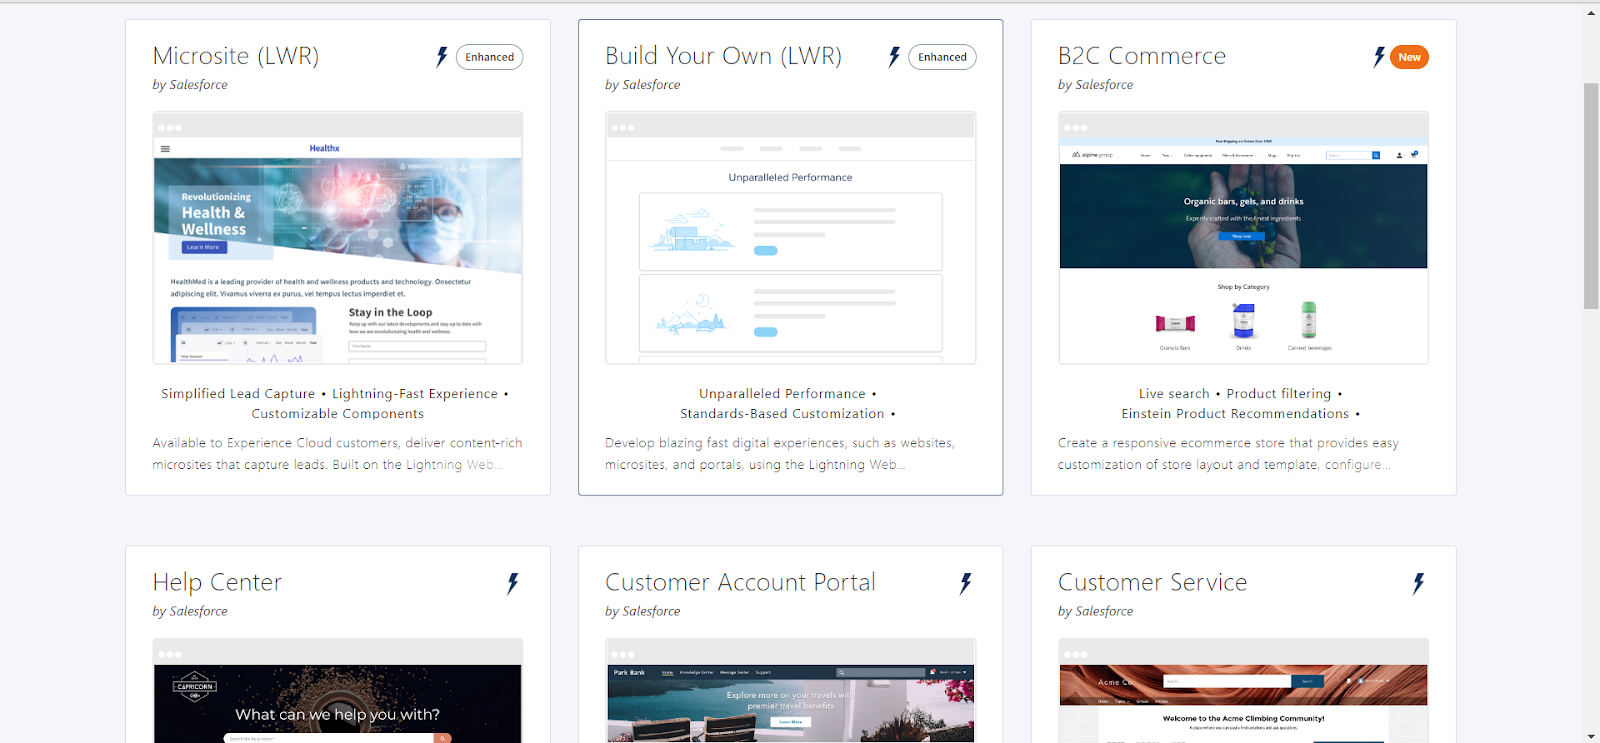
Select the template for your site .
Select New Members : –
Select the profiles you need to operate the community and provide them with permission to access the created community.

Add the engaging content :
You can add any tab that reflects the nature of the content. FAQ, use cases, and so on –
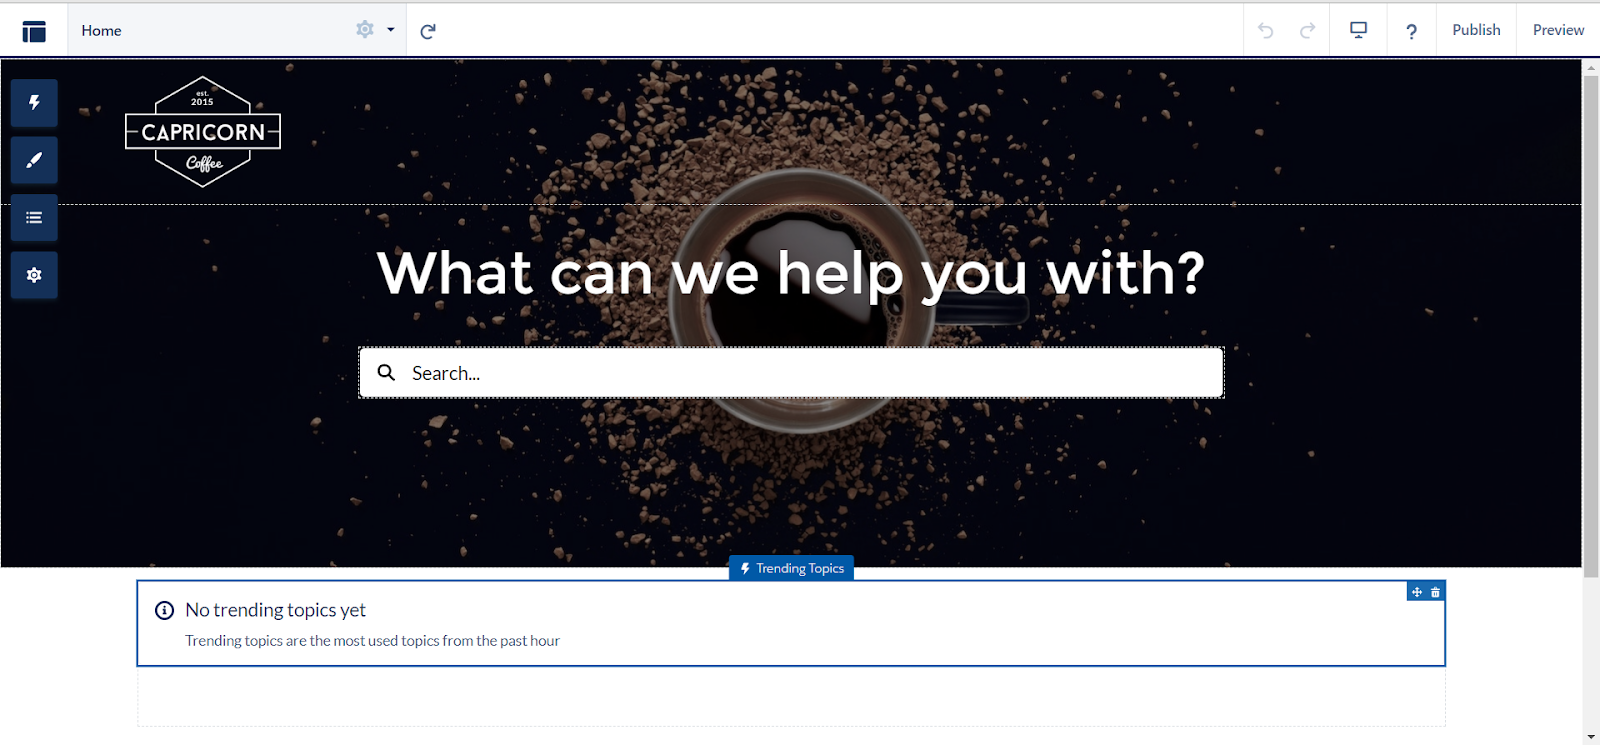
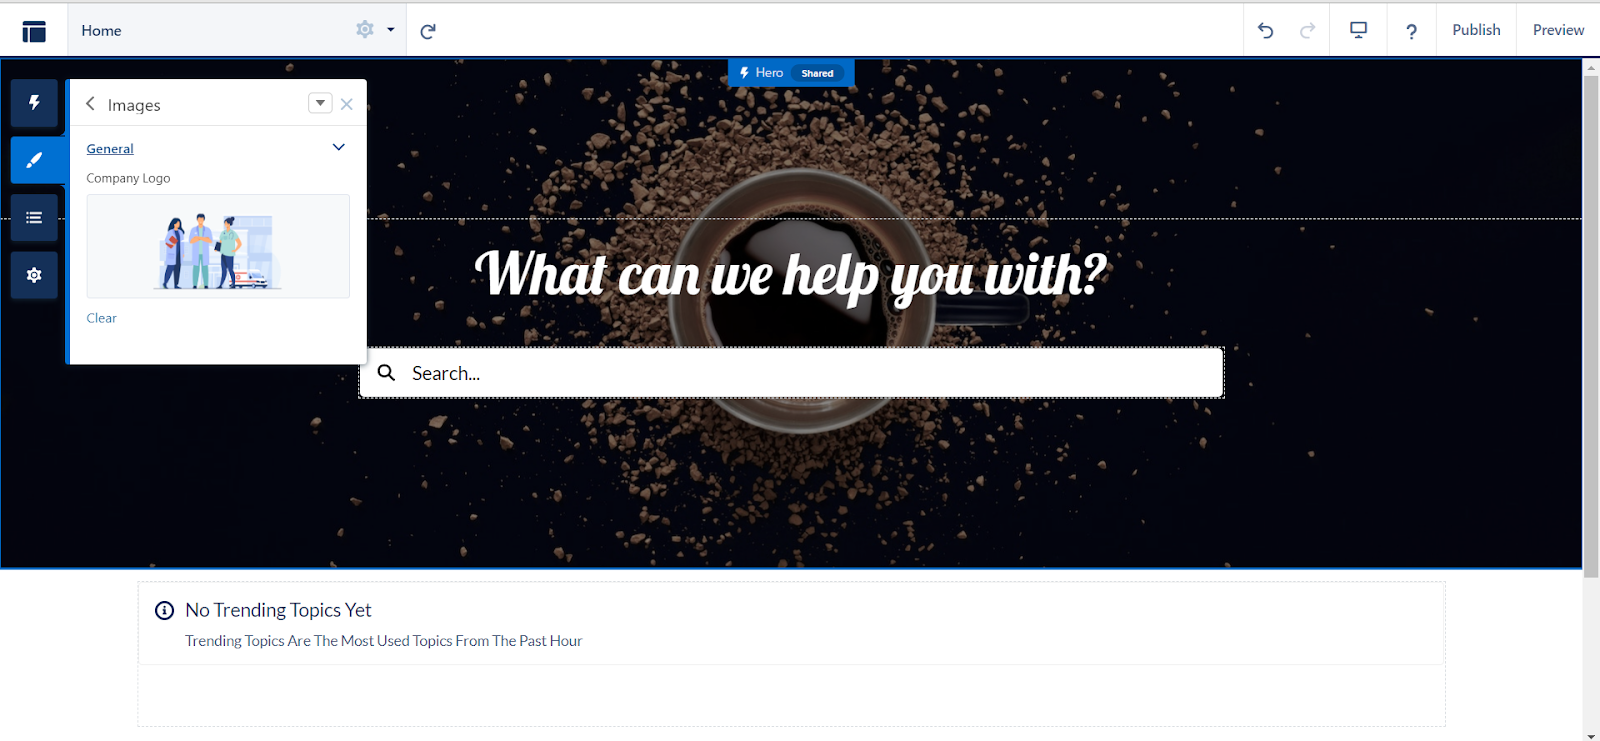
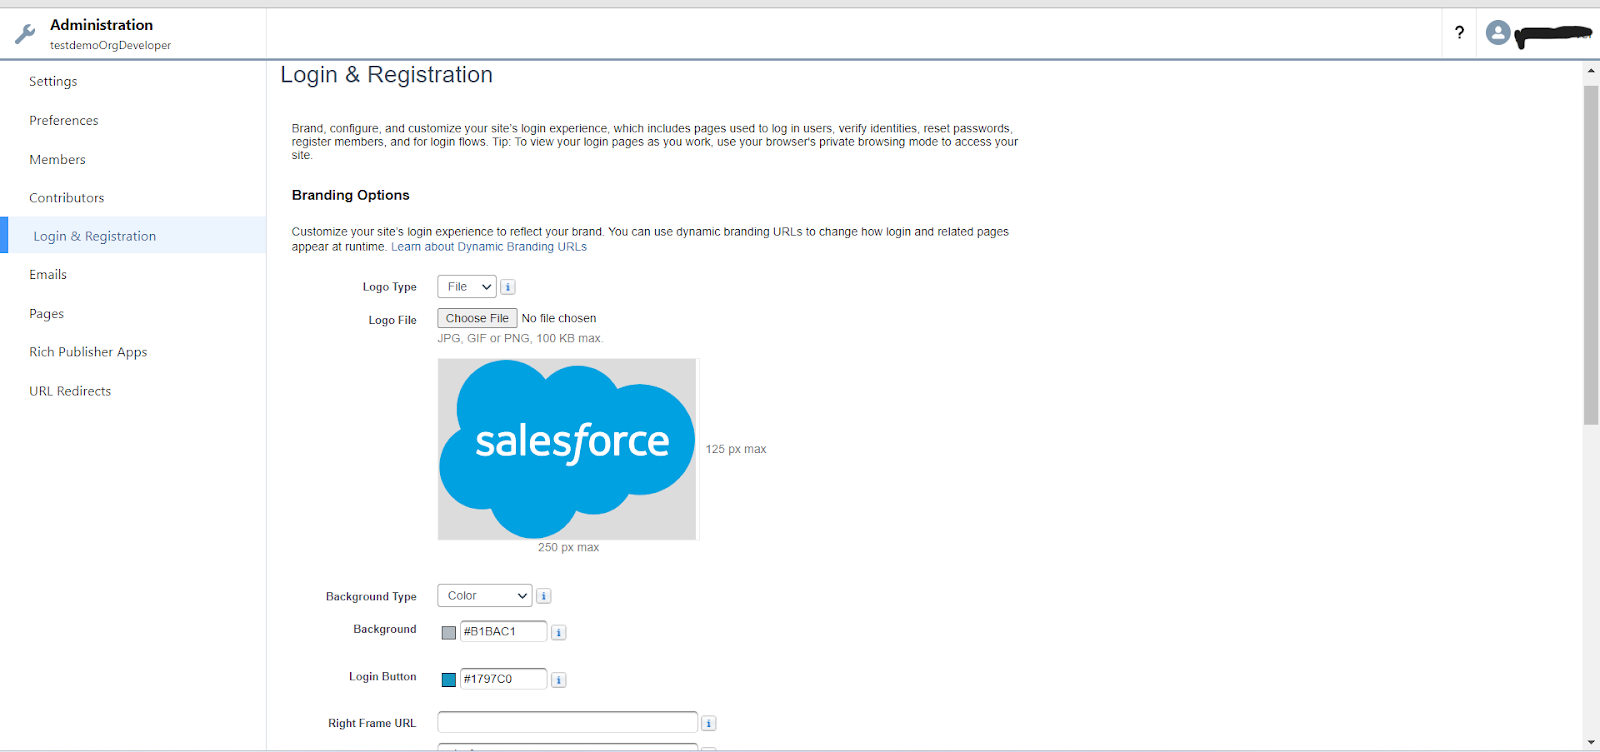
Brand your community
Upload the logo and add the tagline. Change the colors, styles, etc. This is used for community looks unique and memorable, thus raising the brand awareness of your users.
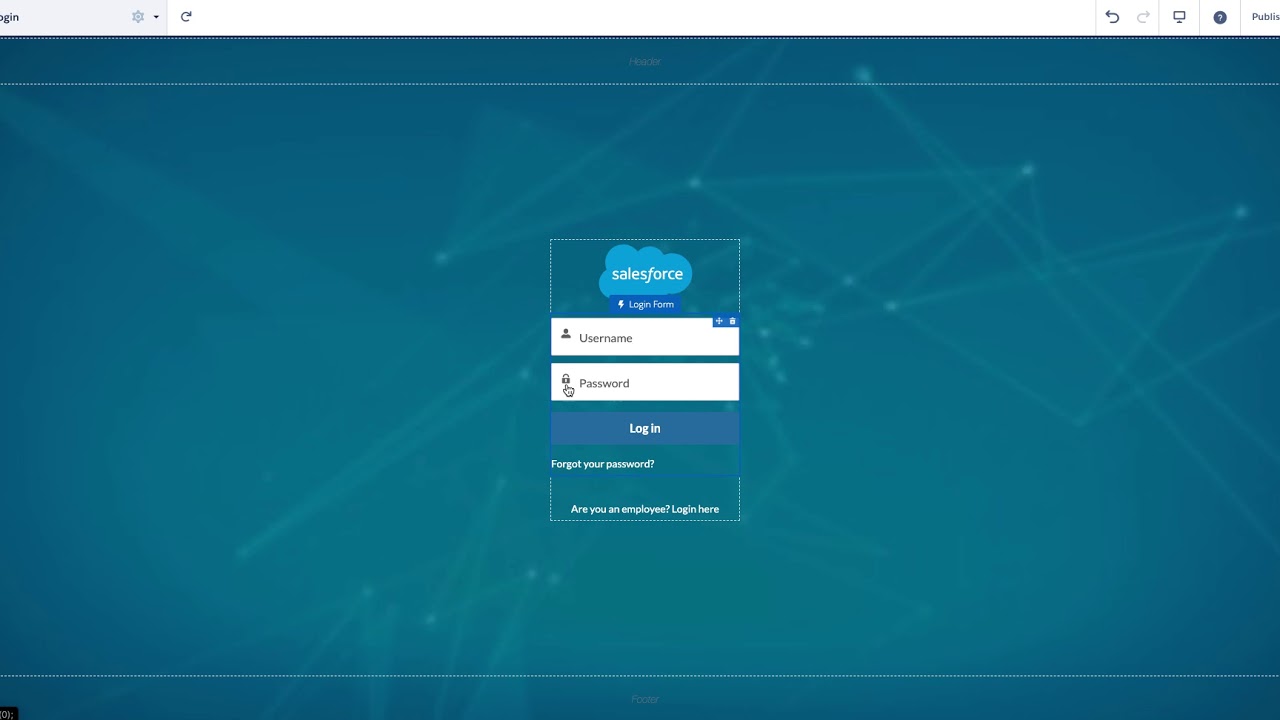
Customize your login page:
We can not perform community page branding only, but you can also customize the login page.
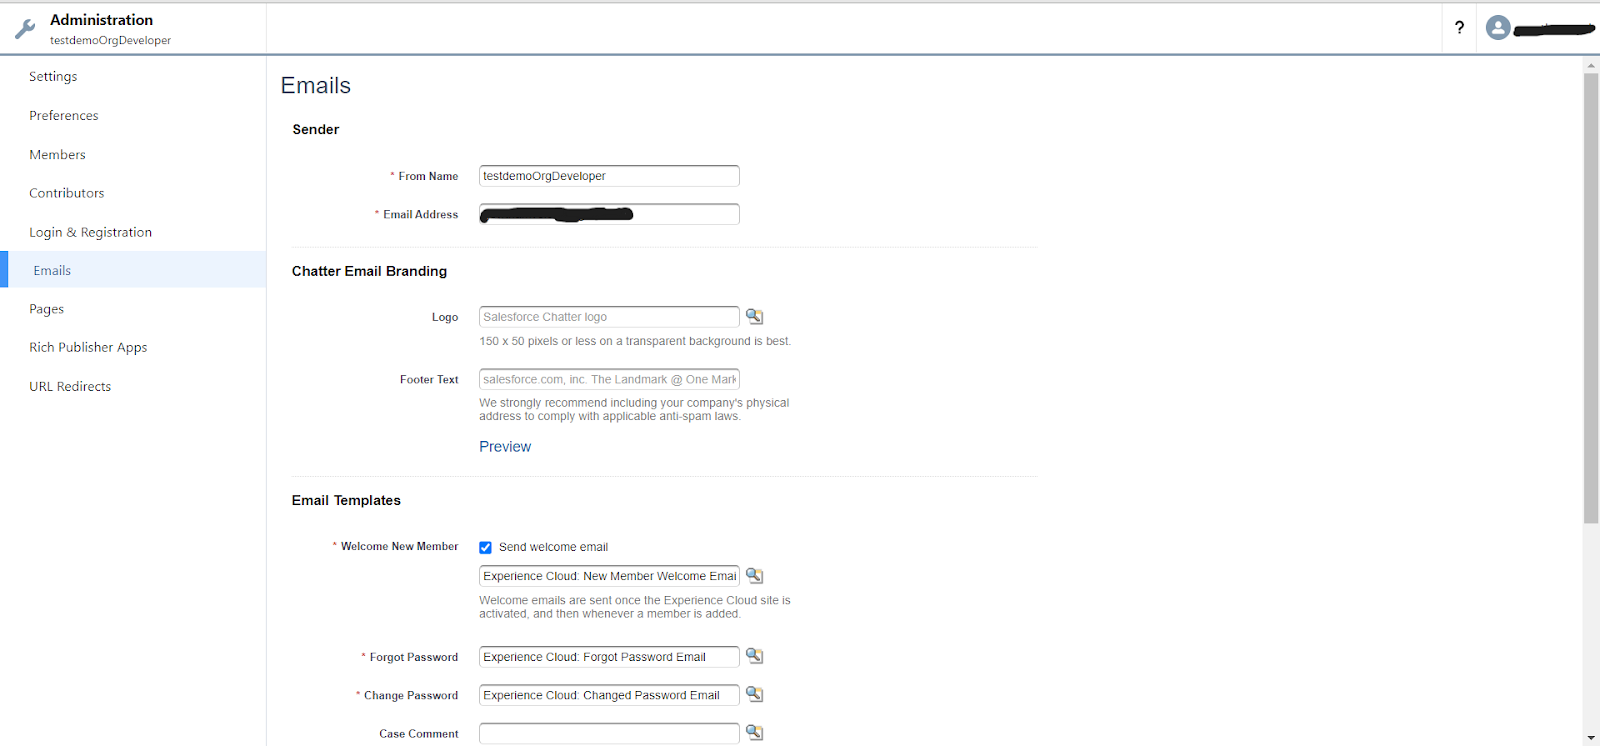
Configure the email :
Here, you can set up the generic email address to add branding details and a customized message.
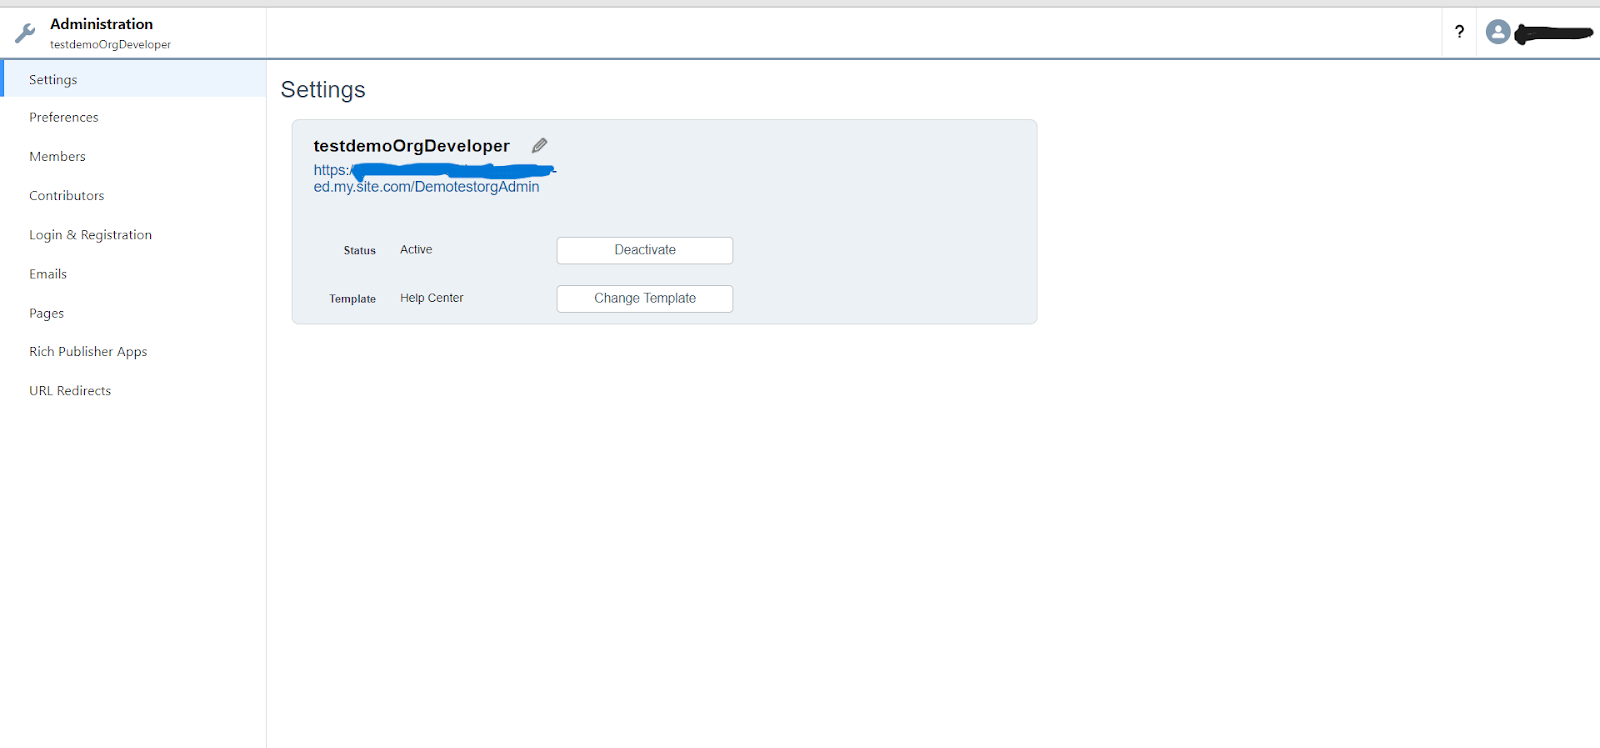
Adminisitration Status :-
Adminisitration in setting has the status . Click ‘ Activate ‘ activating your Community Will Make Your Community Live and Available on the internet , so that anyone will be able to access the Community through Community`s URL .
Put in the finishing touches :
Once you are ready with all the steps outlined above, take a chance to preview the community. During this stage, you can play with it, get your employees’ feedback, introduce the final changes, and publish it.
Finally Your Salesforce community cloud site is ready to use.